
Buy PDF guide

Buy PDF guide — 10.90 USD

PDF — 10.90 USD

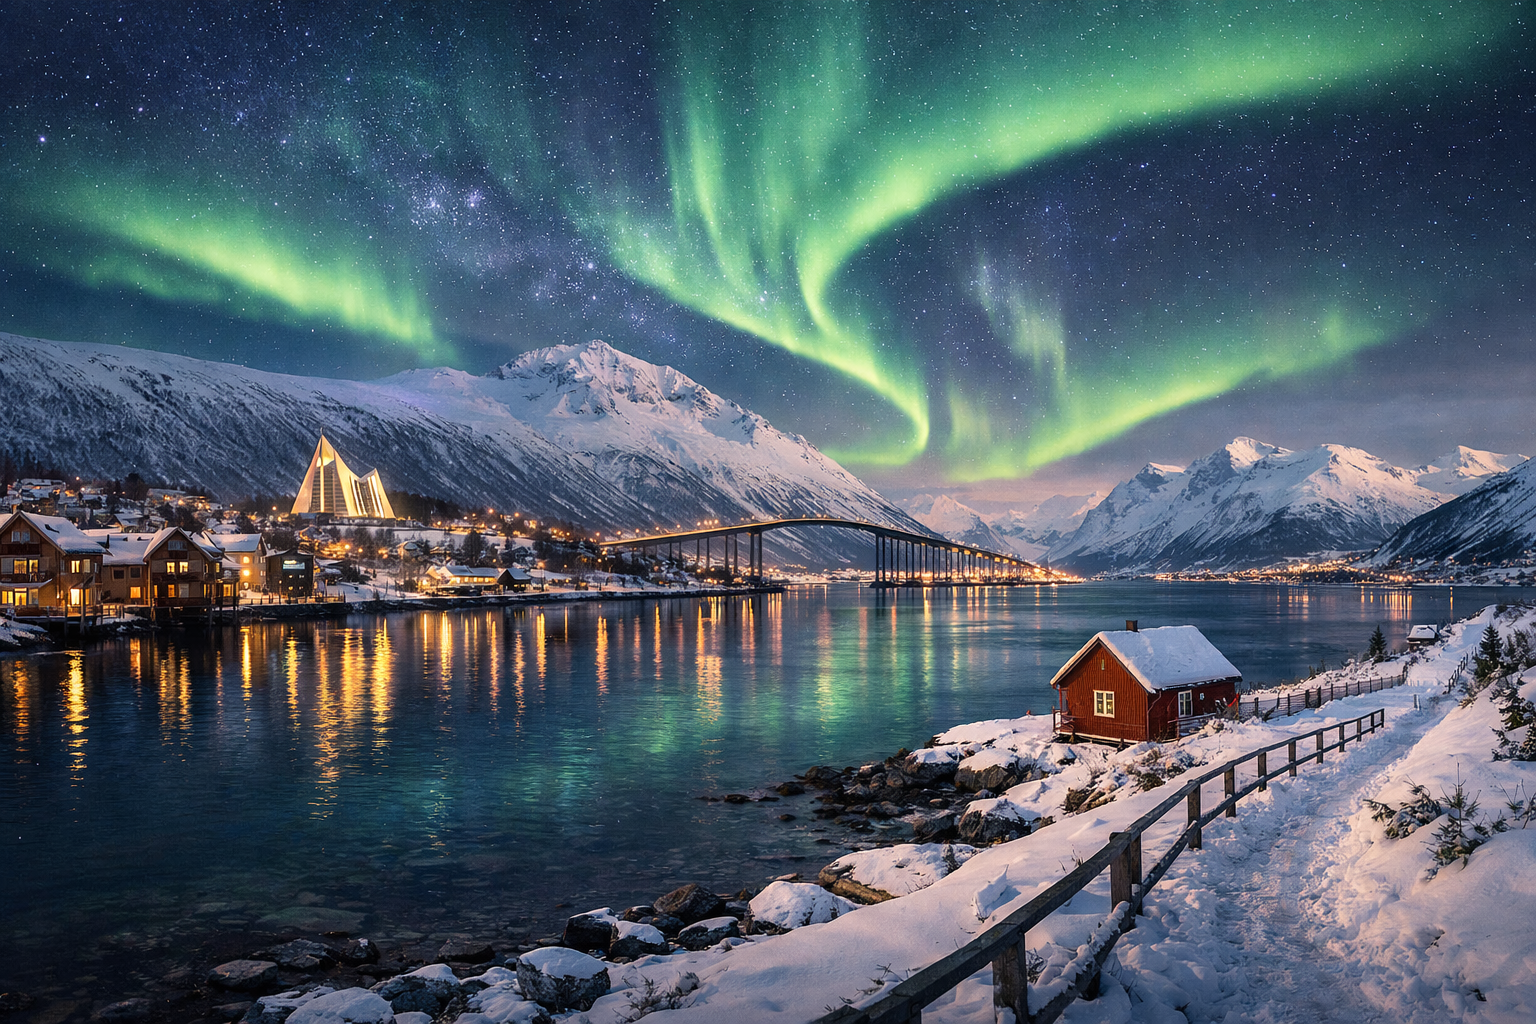
Norway, Tromsø and Kvaløya Island. A winter photo trip in search of the Northern Lights, snow-covered fjords, Arctic beaches, and urban panoramas of Tromsø.

Norway, Tromsø and Kvaløya Island. A winter photo trip in search of the Northern Lights, snow-covered fjords, Arctic beaches, and urban panoramas of Tromsø.

Chase winter light from Tromsø to Kvaløya and Sommarøy on a five-day Arctic photo journey through snow-covered fjords, wild beaches, and crisp island landscapes. From Tromsø’s glowing city panoramas to the dance of the Northern Lights overhead, Norway here feels raw, luminous, and unforgettable.

🧭 DAY-BY-DAY ROUTE

Ready-made country and city routes with daily plans, sights, transport and accommodation. Buy PDF guides for independent travel.

🧭 DAY-BY-DAY ROUTE


Day 1 — Tromsø: arrival, waterfront, city center, and night photography overlooking the city

  • 🚗 After arriving in Tromsø, it makes sense to plan an easy start without long drives: pick up the car at the airport, check into a hotel in the center, and leave the first half of the day for adapting to the Arctic light, cold, and wind. The drive from the airport to the center takes about 10–15 minutes, but in winter it’s always better to allow extra time for car pickup, clearing snow, parking, and the early sunset. A compact urban route is ideal for the first day: the harbor waterfront, viewpoints along the Tromsøysundet strait, the streets around Storgata, and the port area with reflections of lights on the water. This is a great place to photograph blue hour, when the sky still holds a deep cold ultramarine and the windows, piers, and boats begin to glow with warm colors. For beginners, it’s a convenient day to get used to exposure in snow, try long exposures, and understand how equipment behaves in freezing temperatures.

  • 📸 Strong shots for the day: the geometry of harbor facades, Arctic boats and piers, the winter texture of the water, urban minimalism with snow and bright windows, as well as panoramas of the bridge and the mainland shore. For evening photography, you can head up to the lower station area of Fjellheisen and, if your energy, time, and weather allow, take the cable car for a clean overview shoot of the city from above. The panorama is especially good at dusk and in the early night: Tromsø looks like a compact island of light among black water, snow, and mountains. This is one of the safest and most logical spots for a first introduction to Arctic night photography without driving far into unpredictable road conditions.

  • 🌌 If the cloud and aurora forecasts are favorable, the evening is worth finishing with a short night drive to the nearest dark areas of Kvaløya or to more open shores beyond the dense urban light pollution. But don’t try to "hunt" until dawn at all costs after a day of travel: a tired driver in winter is the main risk of the route. It’s important to remember that the northern lights are not guaranteed even with good forecasts. A backup scenario is to focus on city night scenes instead: reflections, headlight trails, the architectural lines of the bridge, and the glowing port, all of which work beautifully even without the aurora.

  • ⚠️ Practical notes and safety: in the Tromsø area and parts of Kvaløya there are drone flight restrictions due to the proximity of the airport; drone use is specifically prohibited right at the Arctic Cathedral. Tripods are usually allowed outdoors, but they must not be placed in a way that blocks walkways, stairs, doors, or creates a risk on slippery surfaces. Do not go onto closed piers, do not climb over barriers for an angle, and do not stand on icy rocks by the water. The best light from October to March: late morning for soft side light, blue hour after sunset, and then night windows under clear skies. Backup spots in case of wind or wet snow are the harbor area, downtown streets, Polaria, and shooting from open but safe urban spaces.


Day 2 — Tromsø and surroundings: Arctic Cathedral, panoramas from Fjellheisen, and the first full northern lights hunt

  • 🚶 This day is devoted to a combination of architecture and landscape. In the morning or closer to midday, head to the Arctic Cathedral in Tromsdalen: in winter, the sharp light, snow, and distinctive silhouette of the building create a very graphic scene, especially if you frame it with the surrounding mountains and bridge. During the day, it’s useful not to rush and to walk around the safe spots in the area, choosing angles where the white triangular planes of the cathedral contrast with the gray-blue sky. For interior photography and portraits inside, check the current visiting rules in advance and whether separate permission is needed for commercial work. If photographing people, always get their consent in advance.

  • 🚠 In the second half of the day, go up to Fjellheisen. It is one of the most spectacular and at the same time logistically convenient ways to get the classic panorama of Tromsø, the bridge, the strait, and the island’s buildings. The best window is 40–60 minutes before sunset and through the entire blue hour: you’ll have time to shoot the daytime texture of snow and water, then the soft transition of light, and after that the scatter of city lights. In clear freezing weather, the images are especially contrasty and crisp, but it can be very windy at the top, so warm gloves, a spare battery in an inner pocket, and caution on slippery sections are essential. Shoot only from marked and safe areas, without stepping onto closed edges.

  • 🌌 After rest and dinner comes the first full night drive to hunt for the northern lights. For this night, it’s better not to go too far, but to choose a set of accessible shoreline spots on Kvaløya where you can quickly change location depending on cloud cover: Kaldfjord, Ersfjordbotn, or open stretches of road with safe pull-offs. From a photography point of view, this is an ideal training night: you can practice composition with fjord reflections, road lines, small bridges, boats, and snow-covered slopes. Beginners are better off working with a wide-angle lens, tripod, and short series of frames, while more experienced photographers can add panoramas, vertical scenes, and a balance between the aurora and the foreground.

  • ⚠️ Important restrictions: do not stop on narrow sections without an official pull-off, do not park in a way that blocks snow-clearing vehicles, do not step onto ice unless there is official information that it is safe, and do not walk to the water’s edge over uncleared rocks. On Kvaløya the wind can intensify suddenly, and local roads can quickly become icy. If road conditions worsen, the backup option is to shorten the outing and return to shooting panoramas from more accessible spots around Tromsø. Natural phenomena, including the northern lights, fog, and wildlife appearances, are not guaranteed.

Day 3 — Kvaløya: Ersfjordbotn, Kaldfjord, and the dramatic fjords of the island’s western side

  • 🚗 This is the main landscape day of the route, built as a driving photo arc around Kvaløya. From central Tromsø to Ersfjordbotn it is usually about 30–40 minutes without stops, and to Kaldfjord around 20–30 minutes, but in winter you should always allow extra time because of ice, wind, and limited visibility. Ideally, leave not in the dark but toward late morning so you can use the short Arctic day as productively as possible. The road itself is photogenic: narrow ribbons of asphalt, curves along the water, red houses, snowy slopes, and sharp shifts of scale between humans and the landscape.

  • 📸 Ersfjordbotn is one of the most expressive locations for winter landscape photography in the Tromsø area. Here the fjord seems to be squeezed by mountains, and because of that, even in calm weather, the scene feels dramatic and almost cinematic. The best light is late morning and the first half of the day, when side lighting begins to shape the slopes and the snow stops looking like just a white patch and starts showing texture. Look for shots with houses by the water, smooth shoreline lines, the graphic quality of poles and road curves. For beginners, the location is good because of its compositional simplicity, while for experienced photographers it offers the chance to build layered scenes with mountain, fjord mirror, and tiny traces of civilization.

  • 🌊 In the second half of the day, move on to Kaldfjord and nearby parts of western Kvaløya, where you can shoot more open stretches of water and wider horizons. If the weather is clear, this is a good area for minimalist images in a cold palette; if it’s snowing, the atmosphere becomes softer and works beautifully for almost monochrome stories. In stormy wind, coastal waves and snow squalls can look especially beautiful, but you should shoot only from safe roadsides, parking areas, and publicly accessible spots. Do not go down onto closed private piers and do not approach the edge of wet rocks.

  • 🌌 At night, Kvaløya remains the best training ground for the second aurora hunt. Around Ersfjordbotn and Kaldfjord, compositions with reflections, mountain silhouettes, and the shoreline work very well, and with partial cloud cover you can quickly move between fjords, catching windows of clear sky. For safety, always choose stops where the car is completely off the roadway, and keep a headlamp, thermos, charged phone, and extra time for the return drive. Backup locations in case of poor visibility are the closer and less windy areas near Eidkjosen, with a return to the city before conditions get worse.

Day 4 — Kvaløya and Sommarøy: Arctic beaches, bridges, island landscapes, and deep night photography

  • 🚗 Today the route goes farther west, to Sommarøy — one of the most impressive island landscapes in the region. From central Tromsø to Sommarøy Arctic Hotel and the island area it is usually about 1 hour by car, and from the airport about 52 km. In winter, this transfer should not be treated as a simple “one-hour ride”: wind over the bridges, snowdrifts, and sudden changes in road surface require a calm pace. It’s best to head out after checking the forecast, road conditions, and any warnings in the morning. Along the way, it’s useful to make short safe stops at official pull-offs so the drive doesn’t turn into a race for photos.

  • 🏝️ Sommarøy offers a combination rare for the Arctic: white sands, turquoise water, rocky shores, and snow-covered peaks. Even in winter, the landscape here does not look gloomy; on the contrary, in soft light it becomes almost unreal, like a northern island dream. The best shooting time is the middle of the short day and the pre-sunset blue hour, when the bridges, houses, and shoreline curves become especially readable. Here you can build a wide range of subjects: leading lines of bridges, panoramas with islands, coastal minimalism, details of frozen grass and stones, as well as long exposures on the water if the wind is not too strong.

  • 📸 For a photo trip, this is one of the richest days: beginners can easily find strong compositions right next to the road and populated areas, while experienced photographers can vary their framing, shoot verticals, focus on landscape layers, and look for subtler color nuances in the winter light. However, the beaches and shores here are deceptive: there may be ice on the sand and stones, and the waves and wind can quickly change the situation. Do not go too close to the wet edge, do not place your tripod where a gust could wash it away or knock it over, and do not head onto unclear trails at dusk without confident orientation.

  • 🌌 It makes sense to spend the night session here as well, or on the way back through darker parts of Kvaløya. Sommarøy is famous for open skies and marine foregrounds that are especially beautiful with the aurora: green arcs over white beaches and black water create a very clean northern image. But natural conditions here are harsher than near the city: if the wind is strong or the roads become icy, it’s better to shorten the night program and return earlier. Backup locations are the bridges and sheltered sections near the residential area, or moving the main night shoot closer to Kaldfjord. If you choose to stay overnight in Sommarøy, it reduces fatigue and makes night photography safer.

Day 5 — Tromsø: a museum pause, urban finale, and a backup day for light or aurora

  • 🏛️ It’s best to keep the final day flexible: after several night outings, it works as an intellectual and visual pause. In the morning, you can start with Polaria or Perspektivet Museum, then walk through central Tromsø to pick up urban details that often remain “between the big landscapes”: colorful facades, Arctic design, street lighting in snowfall, boats in the harbor, the texture of wooden architecture, and calm everyday winter scenes. This kind of day is useful not only for rest, but also for the completeness of the series: the final visual story becomes stronger when it includes not just fjords and aurora, but also the human scale of an Arctic city.

  • 📸 If the forecast promises good clarity, use the day as a backup for reshooting the most successful point on the route: another ascent to Fjellheisen, a short drive to Kaldfjord, or an extra hour on the waterfront in soft daylight. For a photographer, a spare day is a luxury that often gives the best shot of the whole trip, because it lets you avoid rushing and return to a location already understanding the composition. And if the weather is overcast, snowy, or windy, the city program still works perfectly: in Tromsø you can photograph atmosphere, not just “postcard clarity.”

  • 🚗 This day is also convenient for returning the car, having a relaxed lunch, and getting some early rest before departure. If your return flight is not too early, the last note could be a short evening walk in the port or one more careful night drive only in excellent conditions and with the driver feeling well. There is no need to turn the finale into a marathon. For a medium-difficulty route with night shooting, it is more important to finish the trip without rushing than to squeeze the maximum out of the last night at any cost.

  • ⚠️ Before finishing the route, check once again: drone restrictions, road conditions, wind forecast, official warnings, rules for natural areas, and the current access conditions for photo spots. Commercial, portrait, or interior photography may require separate approval. Tripods and photo equipment should be used in a way that does not disturb other visitors or create a hazard on slippery surfaces. This route is designed for both beginners and experienced photographers interested in night shooting, and it is built around the principle of safe access: no closed areas, no unauthorized crossing of barriers, and no risky positions for the sake of a shot.

Flight tickets

eSIM for travel

Buy PDF guide

Buy PDF guide — 10.90 USD

PDF — 10.90 USD