
Buy PDF guide

Buy PDF guide — 14.90 USD

PDF — 14.90 USD

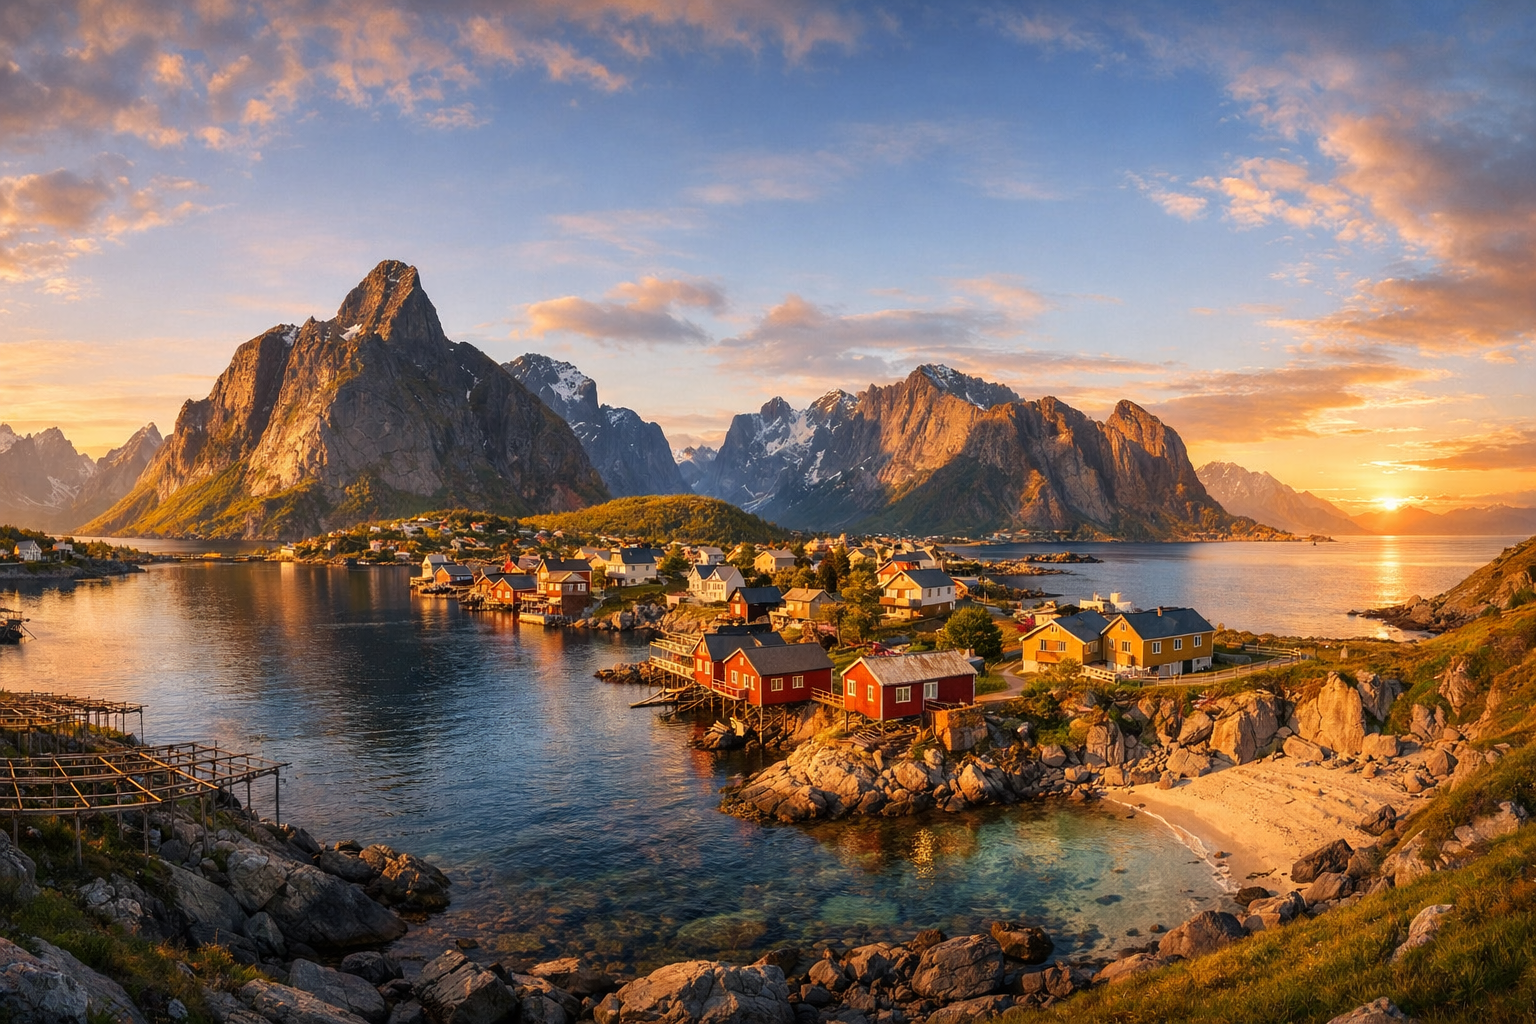
Norway, the Lofoten Islands. A photography journey through Reine, Hamnøy, Sakrisøy, Nusfjord, and the beaches of Haukland and Uttakleiv with fishermen's cabins, Arctic mountains, fjords, and golden hour shooting.

Norway, the Lofoten Islands. A photography journey through Reine, Hamnøy, Sakrisøy, Nusfjord, and the beaches of Haukland and Uttakleiv with fishermen's cabins, Arctic mountains, fjords, and golden hour shooting.

Follow one of Norway’s most photogenic routes through the Lofoten Islands, from the white sands of Haukland and Uttakleiv to the storybook fishing villages of Nusfjord, Hamnøy, Sakrisøy, and Reine. Expect red fishermen’s cabins, sharp Arctic peaks, deep fjords, and long golden-hour light that makes every stop feel cinematic.

🧭 DAY-BY-DAY ROUTE

Ready-made country and city routes with daily plans, sights, transport and accommodation. Buy PDF guides for independent travel.

🧭 DAY-BY-DAY ROUTE


Day 1 — Leknes, Haukland, and Uttakleiv: a gentle introduction to Lofoten light

  • ✈️ An optimistic start scenario for a 7-day photo tour is to arrive in Leknes and pick up your car right at the airport or in town. It is only a few minutes from Leknes Airport to the center, and about 10 minutes by car to Haukland Beach, so the first day can be kept easy and not overloaded. If you arrive via Evenes, allow for a long transfer to the western part of the archipelago and do not try to chase every spot on the same day: for comfortable shooting, it is better to stay around Leknes or Ramberg and leave the big drives for the morning.

  • 🚶 Haukland is one of the most recognizable coastal scenes in Lofoten: white sand, an arc of turquoise water, an amphitheater of Arctic mountains, and a clean horizon line. It is an excellent location for a first shoot because it is easy to reach, has a visitor centre, sanitary facilities, and straightforward access without difficult trekking. For a photographer, the beach works well for wide shots, reflections on wet sand, minimalist frames with lone figures, and a very calm color palette in overcast weather. In summer it is beautiful in the long evening light, while in late winter and early spring the beach often delivers dramatic cool tones, snowy accents on the peaks, and expressive clouds.

  • 📷 The best light at Haukland is late evening in summer and soft daytime/pre-sunset light in February–April, when the sun is low and the relief reads with more volume. If the sky is flat and without texture, use the beach for details: footprints in the sand, surf lines, the texture of boulders, fishing boats in the distance, silhouettes of people against the water. A tripod is appropriate outdoors here, but it should be placed so it does not block pathways or disturb others. A drone is allowed only in compliance with national rules and local restrictions; always check the map of no-fly zones and distances to airports before flying. Near Leknes, restrictions are especially important.

  • 🚗 In the evening, move on to Uttakleiv — from Haukland it is a short drive over the pass and through the tunnel, usually about 10–15 minutes. Uttakleiv offers a completely different character of image: rounded boulders, a wilder foreground, wave-like shoreline lines, and a sense of the open ocean. It is one of the best spots for golden hour and blue hour, especially if clouds are tearing into bands over the sea. Safe access matters more here than dramatic effect: do not step onto wet rocks in heavy surf, do not place your tripod on slippery seaweed, and do not climb to the edge of the waves for a long exposure.

  • 🔁 A backup location in case of strong wind or heavy rain is Leknes itself, its waterfronts, and the more sheltered inland views of Vestvågøy. On the first day, it is better not to plan exhausting hikes: after travel and flights, it is much wiser to shoot two high-quality coastal scenes and go to bed early so you can work with a fresh head the next day.


Day 2 — Nusfjord and the Flakstad area: the history of fishing Norway in the frame

  • 🚗 The drive from Leknes to Nusfjord usually takes about 35–45 minutes depending on the weather and stops at viewpoints. Nusfjord is not just a beautiful village, but one of the most photogenic historic fishing settlements in the region: ochre and red rorbuer, wooden piers, boats, drying racks, a harbor surrounded by rocks, and a remarkably coherent atmosphere of the old Norwegian coast. This place is ideal for unhurried visual work: it makes you want to shoot not only the wide view, but also doors, signs, ropes, old boat hulls, wood texture, and changing light on the water.

  • 📷 The best time to shoot Nusfjord is early morning for a quiet harbor without extra movement, and evening, when warm side light brings the wood to life and colors the cabins in rich amber tones. In overcast weather, Nusfjord also works beautifully: the colors become calmer, and the village itself looks more graphic and cinematic. For bloggers and portrait shots, the piers and rows of houses along the water are especially good here, but when photographing people, do not forget to obtain consent in advance, and for commercial, interior, or staged shoots, check in advance whether permission is required from the accommodation or the management.

  • ⚠️ The key principle of this day is to respect private and working infrastructure. Do not go onto closed piers, do not open the doors of rorbuer for a shot, do not place tripods in narrow passages, and do not block driveways. The village is alive, not a set, and strong content here comes not from crossing boundaries but from patiently observing light, lines, and details. If the weather is stormy, avoid shooting right at the water’s edge and on boards covered with moisture or ice.

  • 🚶 After the main session, you can make short stops around Flakstad and Ramberg. These stretches of road offer spacious panoramas with bridges, bays, and mountain saddles that work well for road storytelling. Those aiming for a landscape series should shoot not only the “postcard” views, but also the transitions between them: a gas station in the fog, the E10 road, reflections in puddles, wet asphalt, low clouds on a pass. These are exactly the shots that connect a major route into a coherent photographic narrative.

  • 🔁 A backup for poor visibility is to work in Nusfjord itself with an emphasis on details and atmosphere, and move long-distance panoramas to another day. For rest and sleep, it makes sense to stay around Flakstad/Ramberg or move closer to Reine if the light allows for a calm drive without fatigue.

Day 3 — Hamnøy and Sakrisøy: classic Lofoten icons

  • 🚗 From the Nusfjord area to Hamnøy it is usually about 1–1.5 hours including stops. This day is dedicated to the most famous views of the archipelago — bridges, rorbuer, narrow straits, and jagged peaks that made southern Lofoten a symbol of northern landscape photography. Hamnøy is a place where almost every turn offers a strong shot: red cabins against snowy or gray granite mountains, curved bridges, turquoise water, and rapid weather changes within a single hour.

  • 📷 For Hamnøy, early or late side light is especially expressive, when the rorbuer gain volume and the water shifts into deep blue-green shades. In February–April, it is easy to capture the harsh northern character of the scene here: snow, changing wind, dark clouds, and strips of light between them. From June to September, the image is softer, the light lasts longer, and transitions of pink, golden, and cool silver are richer. Work with several focal lengths: a wide angle for the full scene, a moderate telephoto for the dense graphic interplay of houses and slopes.

  • 🚶 Sakrisøy is located very close by and complements Hamnøy beautifully. Here you will find yellow cabins, distinctive bridges, a fishing environment, and a more intimate scale. In terms of visual dramaturgy, it is the ideal contrast: if Hamnøy is an iconic grand landscape, then Sakrisøy is a warmer, more tactile story about life on the islands. Look for reflections in still water, bridge diagonals, boats in the foreground, and frames where the color of the cabins plays against the harsh gray-stone backdrop.

  • ⚠️ Do not repeat dangerous habits from social media: do not run onto the road or bridge for the “central point,” do not stand on narrow shoulders where drivers cannot see you, do not climb over barriers, and do not approach cliff edges too closely in the wind. It is very easy to get carried away by “that exact view” here, but a safe shot is always the higher priority. If you shoot with a tripod by the road, use reflective elements on your clothing in the dark and do not leave bags on the roadway or cycle shoulder.

  • 🔁 Backup points include short stops between Hamnøy and Sakrisøy, as well as repeat shooting of the same motifs in a different phase of light. This area works beautifully in a “the same scene in the morning and evening” mode, so do not be afraid to return to a location twice.

Day 4 — Reine: the graphic beauty of fjords, harbor, and golden hour

  • 🚗 From Hamnøy to Reine is literally just a few minutes, so this day can be devoted to very thoughtful shooting without haste. Reine is one of the best-known and visually strongest places not only in Lofoten, but in all of Norway. Here the mountains seem to rise straight out of the water, the harbor creates a natural scenography, and the rorbuer and boats add a human scale to an almost epic landscape. For a photographer, this is an ideal location where you can build an entire series: wide views, the urban landscape of a small northern settlement, pier details, vertical frames with boats, and atmospheric evening scenes.

  • 📷 The best time in Reine is early morning for calm water and evening golden hour flowing into blue hour. In June–July, the soft northern light can last a very long time, so do not leave after the first “peak” — often a second, subtler layer of color arrives later. In spring, the weather changes more sharply: breaks in the clouds can literally create dramatic light and shadow on the slopes and water within minutes. For bloggers, shots of a walk along the waterfront work well, but the strongest images usually come not from posing, but from careful selection of the pier line, the balance of cabins, and the mountain backdrop.

  • 🚶 If your energy allows and conditions are safe, you can take a short walk through the village and its edges without aiming for a long hike. This route is designed as a moderately difficult photo journey with a car and short walking sections, so there is no need to artificially add hard climbs. It is better to invest time in repeated outings for light than to spend it on exhausting elevation gain. If you are interested in elevated shooting points, choose only officially accessible and safe routes, checking the state of the trails, the moisture on the rock, and wind strength.

  • 🌌 In the February–April season, Reine can become an evening point for waiting for the northern lights, but they are not guaranteed, just like fog, ideal reflections, or wildlife. If the cloud forecast is weak, treat the evening not as “aurora hunting at any cost,” but as a full blue hour shoot of wet asphalt, lights in the windows of rorbuer, and a quiet northern harbor. Even without the aurora, Reine often delivers one of the most atmospheric sets of images of the entire trip.

  • 🔁 A backup plan for rain is to work on details in the village, shoot from sheltered points, and rest early before the next day. Reine handles bad weather extremely well: reflections, fog, low cloud, and wet surfaces are more a plus than a minus here.

Day 5 — Reinefjord and Moskenes/Å: the final end of the road and museum texture

  • 🚗 Today it makes sense to continue farther southwest, toward Moskenes and Å. The road from Reine to Å is short, about 20–25 minutes without long stops, so the day is compact and visually rich. The very idea of reaching a place where the E10 effectively comes to its end already works as a strong narrative element: the end of the road, the end of the archipelago, the edge of land before the sea.

  • 🚶 Å in Lofoten is a rare combination of a postcard village and a highly textured historic environment. The Norwegian Fishing Village Museum lets you see what life in a Lofoten fishing settlement looked like: piers, workshops, cabins, a bakery, boat buildings, production spaces. For a photographer, this is an excellent day for combining landscape and cultural layers. Work not only with the overall view of the bay, but also with the material environment: nets, wooden walls, stairs, gates, windows, tools, old stoves, boards, rust, and sea salt on surfaces.

  • 📷 The best light in Å is in the morning and evening, when the complex structure of the settlement gains volume and contrast. In the middle of the day, if the sun is harsh, move into museum details, shadow graphics, and more enclosed subjects. If it is overcast, use that to your advantage: the historic part of the village looks more convincing and deeper precisely in soft northern light. For interior shooting or staged portraits, check in advance whether separate approval is required.

  • ⚠️ This is an important day in terms of image ethics. Do not go beyond barriers, do not use closed areas as a “secret spot,” do not climb onto utility structures, and do not rearrange objects for composition. Respectful guest behavior is highly valued in Lofoten, and a strong photo tour should not damage the environment, but work with it carefully. If you shoot near the water, account for gusts of wind in narrow straits and slippery walkways.

  • 🔁 A backup option is Sørvågen and neighboring stretches of coast if Å is too crowded or the weather turns into steady rain. It is convenient to spend the night again around Reine/Sakrisøy/Hamnøy or stay closer to the far south of the archipelago if you want to catch one more early light.

Day 6 — Return light: Hamnøy, Sakrisøy, and Reine in a second weather phase

  • 🔁 One of the main secrets of a strong landscape route is not trying to “collect checkmarks,” but returning to the best scenes more than once. That is why day six is intentionally left as a second pass through the Hamnøy — Sakrisøy — Reine sequence. In Lofoten, the same point can look like different worlds in different weather: in the morning it may be minimalist and gray, by midday it can open into blue sky, and in the evening it may get a fiery strip of light under the clouds.

  • 📷 Use this day deliberately. If you did not have good light in Hamnøy on previous days, go back to the bridge views and work on the classic compositions without haste. If everything already worked out there, shift into the quieter corners of Sakrisøy and Reine, shooting details of the fishing environment, reflections, boats, poles, signs, drying racks, and village life. For bloggers and travel creators, this is also the best day to record calm walk-throughs, b-roll fragments, and voice pieces against the background of water and mountains.

  • 🌦️ In terms of weather, the day can go in any direction. Wind and precipitation in Lofoten are part of reality, so keep a plan B and do not fixate on one point. In storm wind, choose more sheltered harbors and short outings from the car. In low cloud, semi-abstract shots work very well, when the mountain tops disappear into white and the cabins and boats become the color accent. In the rare clear sky, shoot as long as possible until the end of blue hour.

  • 🚁 If you plan aerial photography, this is the convenient day to make a decision based on actual conditions. But a drone can only be launched after checking local bans, distance to airports, absence of crowds, and the absence of restrictions in protected natural areas. In Lofoten there are popular zones where flights are prohibited, and near Leknes and Svolvær there are airport-related restrictions. Never fly over groups of people, roads with heavy traffic, or sensitive natural territory.

  • 🛌 In the evening, arrange an early rest and equipment-packing buffer: by day seven, it is important to arrive without accumulated fatigue. Northern climate, wind, and constant short exits from the car wear you down more than it seems.

Day 7 — Return via Leknes or departure to the airport/Evenes: final shots and a calm finish

  • 🚗 The final day should be built around your actual departure time. If you are flying out of Leknes, it makes sense to stay overnight closer to the central part of the archipelago and leave the morning for a short final shoot at Haukland, on the coast of Vestvågøy, or in Leknes itself. If your flight is via Evenes, allow for a long drive and do not plan demanding shoots at the last moment: the road from southwestern Lofoten to Evenes takes many hours and depends on the weather, road conditions, and pace of travel.

  • 📷 The final shooting accent is best placed not on “one more must-see,” but on completing the visual story: the E10 road, a farewell view of the water, the last frame of a rorbu in side light, a mountain reflection in a parking lot puddle, a camera bag by a wooden wall, an empty pier early in the morning. These shots often become the best epilogue of a series because they convey not only the beauty of the place, but also the feeling of a completed journey.

  • ⚠️ Before leaving, be sure to check official warnings, the weather forecast, road conditions, possible delays on the route, and the operation of the rental company. For the winter-spring season, wind, wet snow, icing, limited visibility, and longer braking distances are especially important. In Lofoten, it is not worth driving right up against check-in time: it is better to lose an hour in reserve than to risk the entire logistics for one extra stop.

  • 🧭 The overall character of the tour is a compact, moderately difficult photo journey for landscape photographers, bloggers, and lovers of northern nature: a car as the foundation, short walking approaches, repeated outings for light, real breaks for rest, and maximum respect for weather, road conditions, and the private lives of local residents. Northern lights, fog, a perfect sunset, balloons, wild animals, and other natural effects are not guaranteed, but with a flexible approach and disciplined attention to light, Lofoten almost always rewards you with very strong visual material.

Flight tickets

eSIM for travel

Buy PDF guide

Buy PDF guide — 14.90 USD

PDF — 14.90 USD